Night dough bread at home. Cold proofing step by step
Absolutely amazing recipe of bread! For me, it is simply devoid of drawbacks, except perhaps for one thing - I try, in principle, to limit bread in my diet. This is also why I enjoy every bite of this airy bread like a cloud of bread.
It is very convenient to put the dough overnight, and in general, everything related to baking looks like a miracle, because bread lives, rises, amazing processes take place in the dough, which, with some experience, will certainly lead to an excellent result.
Necessary:
Dough:
- Flour - 200 g
- Water - 250 g
- Dry yeast - 1 g (1/3 tsp) or fresh 3 g
- Sugar - 1 tsp
Dough:
- All dough
- Flour - 250 g and you may need a little more
- Salt - 1 tsp
- Sugar - 1 tbsp. l.
- Vegetable oil - 1 tablespoon
Preparation:
For clarity, I am showing a piece of fresh yeast - about the size of a bean or a small hazelnut.

We knead the dough for the night, it should stand hours 10-12... Put all the ingredients in a bowl and mix until smooth.
Dissolve live yeast in water, add dry yeast.

Cover the bowl with an airing film and leave it on the kitchen table on 10-12 hours.
In the morning, this is such a bubble mass.

Put salt, sugar, butter in the dough. Stir lightly.
Gradually adding flour, knead the smooth dough. If it is too soft, add a little flour, but do not overdo it, too tight dough rises hard.

We put it in a warm place to rise, I either put it in a warm oven, 30 degrees, or put the bowl in warm water.
Across 30-40 minutes from the beginning we knead the dough and again leave in warm place.
Total ascent time 2 hours... Do not forget to cover from airing.
Put the finished risen dough on a table or board sprinkled with flour.

Now let's shape the bread.
You can spread all the dough and roll it into a roll, then you get one large loaf.

As soon as I made this bread - hearth, loaf, small and large rolls, large and small loaves.
We put the formed bread in a warm place for proofing. At least an hour.
I have never stopped this bread, since the amount of yeast in it is very small. The better it is set, the more airy the loaf, but within reasonable limits, of course.
In the photo, the dough is spaced, initially there should be a place for rising between the buns.
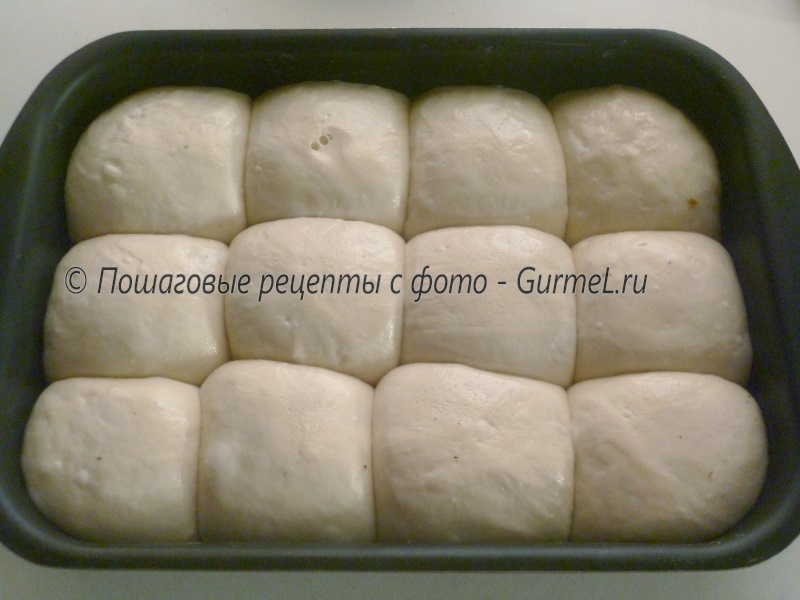

Spaced bread can be cut with a razor blade or a very thin, sharp knife.

We bake the long loaf in the oven for about 30 minutes at a temperature 170 degrees... If the top starts to brown too much, cover it with foil.
Can be proofed and baked in a multicooker. Program "Baking" 40 minutes, turn over and another 20 minutes.
And this is the finished result.


The crumb is light and tasty!


Making bread at home is delicious and interesting!

I will come to you today with a very unusual, "convenient" recipe, how to do homebaked bread ... I love it when the house smells of freshly baked dough (and who doesn't, tell me?), But often my rhythm of life simply does not coincide with the rhythm of bread. Put the dough, wait until it starts working, knead the dough, knead it a few hours later, wait again, shape, distance and only then bake - it seems to be nothing complicated, but at the same time there is a solid connection to the house, which I personally do not always happy. And here it is - a wonderful miracle: "night" dough... And not even overnight, but several days - it can be kept in the refrigerator for up to two days. Can you imagine how convenient it is? Knead, hid, sometimes you watch. Ready, but there is no time to bake now? Let it stand a little longer, it will be tastier. There is time, but there is no desire? Well, I'll do it in the morning. In my opinion, just an amazing find!
I am a refined nature, only the scales, alas, do not understand this.
So now you know that thinking how to make homemade bread without adjusting your life to it, you can turn to this recipe: it is simple, affordable and very, very convenient. I hope you become friends with him as I did myself.
Ingredients:
3 glasses of warm water;
1.5 tsp dry yeast;
2 tbsp. l. honey;
1 tbsp. l. salt;
1/3 cup cornmeal
6.5 cups wheat flour.
From the specified amount, three full-fledged loaves of bread are obtained. If this amount seems huge to you, feel free to divide all the ingredients in half, however, I want to note that having tasted this bread, understanding its taste, catching its aroma, you will regret doing unnecessary math.

Pour warm water into a large bowl (the dough will increase in size), add yeast.

After they start to "play," add all the other components. Pour the wheat flour gradually, focusing on the consistency of the dough - you may need a little less or a little more flour. Ready dough will be slightly sticky, but pleasant to the touch, soft, not clogged.

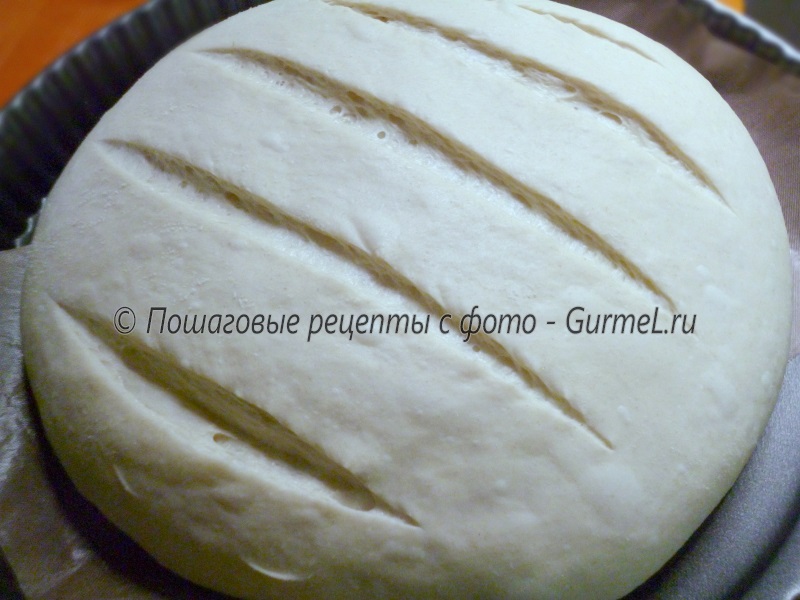
We round it, put it in a bowl, wrap it well in several layers of cling film - so that the dough does not wind up during a long proofing time. And we hide it in the refrigerator for at least 8 hours, better - more. The bread you see in the photo spent a day and a half in the refrigerator before baking.

When you have time to make bread, take out the bowl from the refrigerator, remove the film.

Knead the dough, transfer it to the work surface, slightly dusted with flour.

And form a loaf of bread. Using your fingers, gently stretch the dough into a rectangle.

We wrap it in a tight roll.

Place on a piece of baking paper with the seam down.

Sprinkle lightly with flour, cover with a towel, make several cuts on the top of the bread, leave for proofing for 20-40 minutes in a warm place.

Or we fold a rectangular blank with an envelope inward - there will be a loaf of geometric shape. In the same way, sprinkle with flour, cut, leave for proofing.

We bake bread in an oven preheated to 200 degrees, be sure to put a container with two or three glasses of water down, baking time is about 20 minutes (focus on your oven). When tapping ready-made bread emits a fairly clear, almost sonorous sound.

Cut, of course, only after complete cooling - warm bread will not give a beautiful cut, it will wrinkle. At the same time, however, it is so tasty that it is unrealistic to resist!

But when the bread cools down, you can enjoy both the taste and appearance!
Today I want to tell you and show you how to cook the Alexandrian Easter cake step by step. Usually housewives spend a lot of physical strength to prepare cake dough. Sometimes all family members are involved in the kneading process. Process of creation Easter dough it took my grandmother almost a day, and it was laborious. Alexandrian or Viennese pastry I was amazed by 200%. I'm not tired at all! The kneading process is so convenient that you cannot imagine. It costs nothing to prepare such a cake for a working woman. Usually they put such a cake at night, but, as an option, you can knead the dough in the morning, and after work add the missing ingredients and after 3-4 hours you will have ready delicious cakes for Easter.
Kulich Alexandrian recipe with photo step by step
Let's talk about the test. The peculiarity of the technology is that the dough in the Alexandrian dough is made on the basis of baked milk, yeast, butter, eggs, but without the addition of flour. Yeast is activated. And dough is put for cakes for the night. Please note that the dough itself is sticky, and you do not need to add an additional portion of flour while kneading. Then the crumb turns out to be airy and porous, but at the same time, as if impregnated. When baked cakes are squeezed, the dough quickly regains its shape. If you like delicious cakes, not heavy and not dry - this good recipe tested by many hostesses will be a godsend for you. Especially for site readers Good recipes we will tell and show:
how to make alexandrian cake dough
From this amount of products, I got 3 large cakes and 2 medium ones.
This dough for Easter cakes is gorgeous in all cases. Dough can be put overnight, and in the morning add flour and missing ingredients and knead the dough. After 2-3 hours, it will come up and you can form cakes and bake them. The recipe for Alexandrian Easter cakes does not require a large amount of products and is quite democratic in their composition. The process is not time consuming. The kneading can be entrusted to a kneader or an ordinary hand mixer.
Cooking time - 15 hours (9-12 hours for dough + 3 hours for kneading and baking)
Cuisine: European
Ingredients:
- chicken eggs - 3 pcs.,
- baked milk 250 ml (warm up to 40 degrees),
- wheat flour - 600 g,
- live yeast - 50 g,
- sugar - 2 cups
- butter 120 g,
- vanilla sugar- 1 sachet (25 gr. Or 1.5 tsp),
- salt - 1 tsp (without a slide),
- raisins - 100 gr. (you can put more or add other candied fruits),
- glaze - 1 sachet.
Cooking process:
To prepare the Alexandrian Easter cake dough (also called Viennese), take three eggs. Remove the eggs and butter from the refrigerator in advance so that they are at room temperature. Whisk in 2 eggs and 1 yolk into a bowl. Separate the remaining protein into a small container and refrigerate. Based on this, we will prepare the glaze. If part of the yolk gets into the white, the white will not churn. Therefore, the procedure for separating the yolk from the protein must be done carefully. If the protein storage container is oily, the protein won't churn either. Consider this.

Add 1.5 cups of sugar to a bowl of eggs. For those who love sweet cakes, feel free to put 2 glasses of sugar. Use a wooden or silicone spatula to beat eggs and sugar. It is important not to use metal objects.

Add the butter to the eggs and beat the mixture with the same spoon. The butter will float on top of the egg mass. It should be so. You cannot heat butter to a liquid state. The butter should be at room temperature, but not ghee to a liquid state.

Alexandria dough is prepared with live yeast. In general, it is customary to cook real cakes on the basis of fresh pressed yeast, but save dry fast-acting yeast for buns. Use your fingers to separate the yeast into pieces.

Pour baked milk over yeast and dissolve. This will happen very quickly.

Add the yeast mixture to the egg mixture and stir again. The pieces of oil will still float on the surface of the liquid. It should be so. Beat the mixture well.

Tighten the bowl with plastic wrap and set aside. room temperature at 12 o'clock. For those who are afraid that the dough will leave the bowl during this time, I hasten to assure you that the mass will ferment, but the volume does not increase much, but the container with the dough should be large enough.

Remove the tape after 12 hours. Bulbs will be visible on the surface of the liquid. The oil will still float. Sift the flour for the cake twice and add to the dough in batches. First, 50% flour. Mix liquid with flour, add another 50% flour.

Remove the zest from one medium-sized orange. Peel off the zest so as not to touch the yellowish-white part of the orange skin. We need orange peel. The yellow part of the skin gives bitterness. Add zest and a quarter teaspoon of salt, vanilla sugar to the dough.

Dough for Easter baking can be kneaded by hand or with a mixer with a dough attachment. Mixing time 10-15 minutes. Add washed and sorted raisins to the dough. You can add other additives, such as candied fruits. You can't spoil porridge with butter.

When the dough is ready, shape it into a ball. Place in the bottom of the bowl (the bowl should be deep enough). The dough will increase 3-4 times. It rises quickly and easily enough. Tighten the bowl cling film and transfer to a warm, quiet place. You can put it somewhere near the battery. If you use a warm oven or slow cooker for lifting, remember that at temperatures above 40 degrees, the yeast breaks down and will not rise.

For baking Easter cakes, you can use paper, silicone or metal molds. Any will do. I use paper ones. I do not grease paper forms. Ready-made Easter cakes are perfectly separated from the paper, and there is no need to grease them. If the walls paper form grease, then the dough will have nothing to hold on to when proofing. If we are talking about metal forms, then they can be wrapped from the inside with baking paper. Then the cake will easily come out of the mold after baking.

After 3 hours from the moment of kneading, the dough will triple. Here you can observe. The dough stood for 2.5 hours. I gave him some more time, and when it reached the edge of the bowl, I kneaded it.

Place a piece of dough in each mold so that it fills the mold by 1/3 part. When placing the dough in the molds, take care that the raisins do not stick out on the surface. When baked, it will burn, and you cannot drown it in a suitable base. The dough will drop sharply. Everything must be foreseen at once. Cover the molds with the blanks with cling film. This will prevent the surface from weathering during the proofing period.

After 30 minutes, the dough will reach its shape limit. When baking, already in the oven, the Easter cakes will rise.

Preheat the oven to 160 degrees, and we will bake the cakes at this temperature. Usually the dough is baked at 180 degrees, but at a high temperature the cake will be very dark, it may even burn. Gently transfer the molds with the dough that came up to a baking sheet, and then put them in the oven for baking. While the dough is being moved, do not drop it, hit it or act rudely. The dough is very tender and may fall off.

Remove the finished cakes from the oven and cool completely. Remove the white of 1 egg from the refrigerator. Use a commercially available frosting, prepared according to the instructions on the package, or add a pinch of salt and a couple of drops to the protein lemon juice... Add 4 tbsp. spoons icing sugar and beat until fluffy white. Lubricate the Easter cakes with the resulting mass. Decorate to your liking.

In every sense, the dough is gorgeous, and the finished cakes are perforated, the crumb is very tender.

Alexandrian or Viennese Easter cakes recipe with a photo from Varvara Sergeevna specially for the site Good recipes
Long dough bread from the refrigerator
Recipe white bread on a long dough, which ripens in the refrigerator.
Wheat bread in the oven.
Crispy crust, delicate elastic crumb, rich taste and smell of bread.
To bake such bread, you need long fermentation and little yeast. Of course, the best way- bread on an ordinary long dough.
Most of us do not have time for this, because with a small amount of yeast, the dough can mature from 8 to 16 hours.
In search of a recipe for a delicious bread that smells like bread, not yeast, I discovered a way when the dough rises in the refrigerator for about a day. I liked the method.
In any case, it is convenient in that you do not need to follow the dough. This saves time. I admit that if we were warmer in the refrigerator, the dough could be overripe in 24 hours. Therefore, for the first time it is worth looking after her when the term approaches the end.
I put on the dough at 10 or 11 o'clock in the morning, and the next morning at 8 o'clock I have to check it. If the dough is not going to fall off, let it be all the prescribed time, and still, once in half an hour, I will watch it.
The method is far from ideal, especially for a single loaf. It is difficult to measure small amounts of yeast.
Previously, I took less than half a teaspoon of yeast for dough, and added very little to the dough at the tip of a teaspoon.
Then I came up with the idea of measuring the yeast with a 5 ml medical syringe. There is also 5 ml in a teaspoon. We throw away the needle and the plunger from the syringe, here is the graduated beaker. The method is described in detail.
For dry yeast "Saf-Moment" in 1 ml syringe 0.63 grams of yeast. Therefore, I indicate the amount of dry yeast in grams and ml.
The quality of the flour greatly influences the result. The bread is different. It seems to me that the use of first grade flour is more successful for bread, but I often bake from premium flour.
What kind of bread will turn out very much depends on the temperature regime. Most often, a baking temperature of 230-250ºC is recommended, but I prefer it when the bread is baked for almost an hour at a temperature of about 210ºC. This is my personal preference for drier pulp. By the method of tests, you can find the best option for yourself.
Unfortunately, we often don't know the true oven temperature. Therefore, I advise everyone to buy a thermometer.
Use your hands to mold a rectangular cake as wide as the length of the mold. Roll up the cake, pinch the end. Place the dough in a brick mold with the seam down. Cover the mold with cellophane with a bubble on the rise so that the dough does not dry out.
11. Put the bread for proofing in a warm place for 1 hour or even 2 until the volume increases 1.5–2 times.
12. Before baking, you can cut the top of the bread with a sharp knife, oiled vegetable oil... A clerical knife is well suited for this.
Bakery:
13. Bake in an oven preheated to 230ºC. Steam oven - put a stable mug or bowl (metal or enamel) with a glass of boiling water on the lower baking sheet, remove the dishes with water after 30 minutes, add gas to 250 degrees and bake until tender, that is, until the crust of the desired color.
Baking time is about 40 minutes.

14. Grease hot bread with a very thin layer. butter, cool on a wire rack. Wrap in a towel.

If you put the bread in a bag without paper, the crust will become soft and crunchy.
Hello friends!
It is quite difficult for a working person to bake bread on weekdays. Coming home from work, you don't really want to spend the whole evening, and sometimes half the night, on bread, no matter how tasty, healthy and beautiful it is. Usually, my day, or rather the evening, goes like this: at 7 pm I'm at home, it turns out that mice, during my absence, attacked the refrigerator. The attack was repulsed, and for fearsome purposes, one of the invaders was hung in the refrigerator by the tail, or maybe the refrigerator became a kind of Guantanomo for her, and she jumped up herself. One way or another, but the fact remains - you have to go to the store. It's another couple of hours. In total, at 9 pm I start to cook dinner / lunch, by 11 I finish, if I'm lucky, I overeat from the belly for the night and fall to sleep. This is, if not bake bread. And if the oven? Then I drink water and go to bed for an hour at 2 am, hungry.
I thought a lot on this topic and came to the conclusion that getting up 15 minutes earlier than usual to put the dough and leave it until the evening is much preferable to night dances around dough and dough. Especially if you want outstanding bread, with a powerful wheat aroma, which does not stale for a long time, which is not a shame to give. I have not yet reached the cold method of conducting the test, but soon this option will also be mastered, recorded, filmed and presented to your judgment. Until then, I will show delicious bread, in just 1 gram of yeast.
In the morning, before leaving for work, put the dough. After 10 hours, start the dough on this dough, ferment it, shape the bread and bake. The intoxicating sweet aroma of wheat bread is throughout the apartment, making its way from the tightly closed cast iron cauldron and through the oven. Children run in circles and shout: "Hurray! Buns!", But even after removing the bread from the oven, they are not disappointed. And if you spread butter on a decent slice of bread, with the softest, downy crumb, thin crispy crust, still warm - better than any cake, I’m telling you for sure!
Dough:
200 gr. cool water
200 gr. wheat flour, premium
Mix flour and yeast. Pour in water and knead the dough. No beating or long stirring. Mix with a fork until smooth and that's it. Tighten the bowl with plastic wrap and leave for 8-12 hours. Oprah should increase 4-5 times in volume, be covered with air bubbles and begin to fall off in the center, with a light tap on the bowl. In my kitchen, at + 24-25 ° C, the dough was ready in 10 hours.
Dough:
300 gr. wheat flour, premium
100-150 gr. water, room T
0.5 gr. (1/8 tsp) instant yeast
6 gr. salt
Dissolve the yeast in 100 grams of water. Pour in yeast water into the dough and stir. Add flour and mix the dough with a fork or spatula until the flour is completely moistened. Leave on for 30 minutes for autolysis. Then add salt to the dough and knead with a hook or hands, 8 - 12 minutes, until the gluten develops moderately. The dough comes out elastic, not sticky at all. Roll the dough into a ball and place in a bowl greased with vegetable oil. Roll a ball of dough over a bowl so that it is covered with a thin layer of butter.
Fermentation: 2 hours, with two kneading, after 30 and after 60 minutes. When kneading, put the dough on the work surface, flatten it with your palms into a cake. Put one hand in the middle of the layer, with the other hand grab the edge of the dough and pull it out, and then put it on the center. Repeat the procedure with the other edge of the dough, then unfold and repeat. It will look like a cube. Take the dough in the palm of your hand and drag it across the table, slightly pressing the bottom, with an angle towards you. Rotate 90 °, repeat 3 more times. Thus, seal the seam and collect the dough into a kind of ball. Return to bowl.
When the dough is fermented, separate a piece weighing 100 grams from it, knead it, roll it into a ball, wrap it in a plastic bag and put it in the refrigerator - we will need it for the next bread. It is we who store the pâte fermentée or old / sour dough. It will serve as an analogue of the leaven for other bread, which I will talk about next time.
We have 700-750 grams left. test. It needs to be divided in half. Roll each half into a ball, cover with foil and pre-proof for 20 minutes.
Forming: flatten each bun with palms into a cake. Whether or not to squeeze out air bubbles is a matter of personal preference. I prefer to squeeze out too large air bubbles. Then form a batard from the cake.
Forming bread with batard is clearly shown in this video:
If the video, for some reason, is not visible, then here is a link to it on YouTube:
http://www.youtube.com/embed/XCPJPsRAm5Y
The only difference is that I fold the dough into a triangle only on one side, and then I twist it the same way, pressing the dough into itself. That is, the combination of batard and classic loaf molding is obtained. Why - it's more convenient for me.
Proofing: 40-45 minutes, in a floured towel or canvas, seam up, covering the rolls with the edge of the same towel on top. Before planting in the oven, make 3-4 shallow cuts.
Baking: in cast iron under a lid (240 ° C), or on a steam oven at 220 ° C, in the first 20 minutes of baking. Then lower the temperature to 210-200 ° C, remove the steam / lid and bake for 5-10 minutes. For a harder, crisp crust, you can hold the bread in the turned off oven, with the door ajar for another 7-10 minutes.
Allow the finished bread to cool for at least 30 minutes.
Since I almost always bake bread at night, I leave the bread on the wire rack until morning.
Just great bread, very, very aromatic. 2-3 days does not get stale. Store directly on the board with the cut side down.