What can you cook from jellied meat recipes. How to cook jellied meat correctly: what to put, how much to cook, when to add salt, the best recipes for jellied meat
According to Russian tradition, with vigorous horseradish and hot mustard. And this is exactly the dish that you want to treat your friends to.
Great combination different types meat, the lack of exact proportions, the ability to change the composition of the dish, gives scope for culinary imagination and a huge number of recipes for cooking jellied meat. Rustic option - from pork legs, head and ears, for joints - from beef legs, tails or horse meat. Diet option- chicken, crow's feet and tender turkey.
Do you know how to cook delicious jellied meat with a jelly-like transparent amber broth? Join us! Let's cook together and learn all the cooking tricks!
The classic recipe for homemade jellied meat from pork legs and horseradish shank

Ingredients:
- pork knuckle- 1 PC.
- pork legs - 3 pcs.
- chicken legs - 5 pcs. (optional)
- carrots - 1 large
- peeled onions - 1 pc.
- garlic - 3 cloves
- salt - 1.5 tbsp. l.
- allspice peas - 5-6 pcs.
- black peppercorns - 15 pcs.
- greens - for decoration
Preparation:

1. Meat plays the main role in the preparation of delicious jellied meat. We select those parts of the carcass in which there are enough gelling substances. In our case, these are pork legs and a knuckle. They gel well when cooled. meat broth no gelatin added.
2. Legs must be well seared and cleaned, otherwise we risk getting a dark broth with a burnt smell. Soak the meat in cold water, leave overnight. In the morning we drain the water with the remnants of blood, carefully scrape the scorched places.

3. Washes under running water and, without separating from the bone, put in a 5 liter saucepan, pour cold water, so that its level is 3 cm higher than the meat.
4. We take into account that the water during the cooking process (about 6 hours) will boil away strongly and it is not advisable to add it.
Fill with cold water, at the rate of 2 liters of water per 1 kg of product and cook for 6-8 hours, periodically removing fat and foam

5. Continue to cook at a low boil.
6. 1 hour before the end of cooking, put in the broth, whole peeled juicy carrots, and an onion in the husk. After another 30 minutes add salt, bay leaves and spices.

7. Well-cleared of foam, the broth turns out to be transparent, and onion peel colors it in a beautiful amber color.
8. Take out the finished meat and vegetables. The bulb and bay leaf will no longer be useful to us. Leave the carrots for decoration (optional).

9. Strain the broth through a sieve 2-3 times.
10. Slightly cool the boiled meat, pass it through a meat grinder. Add the garlic passed through a press and mix with the meat.
11. At the bottom of the mold, place the carrots cut into small slices, top with the meat and pour the broth.
12. We send to a cold place for solidification. Serve jellied meat with mustard and horseradish.
How to cook beef jellied meat at home
Delicious and rich jelly is obtained from beef meat, thigh, legs. And even a beef tail, in which there is a lot of cartilage and enough meat, will be used.

Ingredients:
- veal with bone - 1 kg
- beef legs - 1 pc. (1 kg)
- butt beef joint - 500 g
- carrots - 1 pc.
- onions - 1 pc.
- garlic - 5 cloves (optional)
- slice of celery
- spices, salt - to taste
- bay leaf - 2 pcs.
- vinegar 9% - 1 tbsp. l.
Preparation:
- Put the processed, chopped fetlock joint, meat with bone, a leg into a 10-liter saucepan and pour 6 liters of cold water.
- Bring to a boil over high heat and drain the first broth. We thoroughly rinse the sides and bottom of the pan from curdled protein and foam.
- Thus, we kill three birds with one stone: we get rid of the smell and greasy taste, reduce the calorie content and get a transparent broth.
- Rinse all the meat ingredients under running water and put them back in a clean pot of water.
- Bring it to a boil again, now there is not much foam. We remove it and continue to cook the jellied meat at a low boil for 6-8 hours.
- In the middle of cooking, put the roots, half an hour before the end of the salt, spices and vinegar.
- Jelly can be cooked without garlic.
- We take out the cooked meat, joint, leg, remove bones and tendons. Chop finely.
- Put the chopped meat back into the strained broth, bring it to a boil again.
- In the first layer, put beautifully chopped pieces of carrots and greens into the mold, on which meat. Fill with broth and leave to solidify in the cold.
- Serve with hot potatoes, mustard or horseradish.
Jellied assortment of pork, beef and chicken
Ingredients:
- pork knuckle - 800 g
- beef meat - 300 g
- chicken - 1.5 kg
- carrots - 3 pcs.
- onions - 3 pcs.
- garlic - 3 cloves
- salt to taste
- horseradish sauce
- celery root
- black peppercorns - 15-20 pcs.
- bay leaf - 4 pcs.
- ground black pepper - to taste
for decoration:
- egg white
- pomegranate seeds
- parsley
Preparation:
- We put all the meat ingredients in a saucepan, fill it with cold water so that its level is 3 cm higher than the meat, and put it on the fire.
- When boiling, removes the foam, and cook over low heat until the meat begins to separate from the bones.
- 30 minutes before the end of cooking, put vegetables and spices in the broth.
- Free the boiled meat from the bones and cut into small cubes.
- Remove the fat film from the broth and filter through a fine sieve. Season with crushed garlic, salt and pepper.
- For decoration we cut beautifully boiled carrots, egg white, add pomegranate grains. Mix everything with meat cubes.
- Fill the portion molds with the mixture and fill them with clear broth. We leave in a cold place.
- Before serving, carefully circle the jelly in the molds with a sharp knife and turn over onto a flat plate.
- Jellied meat can be poured into a beautiful deep plate and served directly into them, and cut into portions at the table.
- Serve horseradish sauce with vinegar separately in a gravy boat. Bon Appetit!
Pig in a bottle for New Year
There is very little time left until the New Year and it's time to start preparing dishes for the festive table. If you want to surprise your guests, prepare a traditional jellied meat and serve it on the festive table in an original way, in the form of a pig.

We need:
- pork legs - 2 pcs.
- chicken - 1/4 part of the carcass
- carrots - 1 pc.
- onion - 1 pc.
- celery root - 1/2
- bay leaf - 2 pcs.
- peppercorns - 10 pcs.
- salt, ground black pepper - to taste
For registration:
- boiled sausage
- cloves - 4 pcs.
Preparation:
- How to properly cook the broth and boil the meat has been described above. Let's go straight to the design of the piglet.
- We need a 1 liter plastic bottle with a wide mouth. Usually they sell milk in such bottles in the grocery store.
- We cut the boiled, cooled meat into small pieces and disassemble into fibers.
- We put it in a bottle, pour the broth through the funnel. We close the lid and send it to the refrigerator.
- When the broth hardens, cut the bottle across, free our "pig" and put it on a dish on lettuce leaves.
- Cut out ears and a patch of boiled sausage. We decorate the piglet and eyes with carnations. Don't forget about the ponytail.
- Look what a great good-natured pig we have turned out. He's just super!
Turkey jellied meat without gelatin
Such jellied meat will harden well without adding gelatin, but if it stands for some time on the table, it will begin to melt. The added gelatin will hold the jelly well. Therefore, decide for yourself whether you need it or not.

Ingredients:
- turkey drumstick - 600 g
- turkey meat - 1.5 kg
- carrots - 2 pcs.
- onions - 1 head
- peppercorns - 4-5 pcs.
- parsley root - 1 pc.
- bay leaf - 1 pc.
- salt to taste
- gelatin - 1 1/2 tbsp. l. (optional)
Preparation:
- For boiling meat, it is better to use a large saucepan of 5 liters.
- Put the turkey meat and drumstick in cold water, bring to a boil.
- We remove the foam.
- Add seasonings and cook over low heat until cooked.
- Remove the finished meat from the broth, cool and cut into cubes.
- Strain the broth through three layers of gauze.
- We take instant gelatin... It does not require pre-soaking. Dilute in a small amount of warm broth, pour in and boil along with the main broth.
- Pour 1 cm high broth on the bottom of the mold and let it harden. We spread the meat, make decorations from carrots, sprigs of herbs. Optionally add green pea, corn, sliced eggs. Pour everything with broth and keep in the cold.
- The same jelly can be made from chicken.
Chicken jelly in a slow cooker
The main advantage of the multicooker is that it allows the hostess to do other household chores or relax while cooking.
Ingredients:
- chicken - 1300 g
- chicken legs - 500 g
- onion - 1 pc.
- carrots - 1 pc.
- bay leaf -2-3 pcs.
- cloves - 5 pcs.
- allspice peas - 4 pcs.
- black peppercorns - 4 pcs.
- garlic - 2-3 cloves
- salt to taste
That's all. I tried to write in sufficient detail how to cook delicious homemade jelly... If you have any questions during the cooking process, write in the comments. I will answer with pleasure.
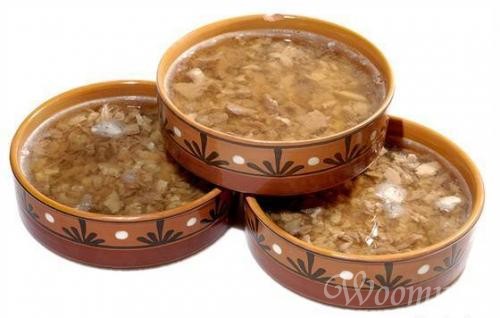
Fragrant transparent jellied meat is a frequent guest at many festive feasts and celebrations. For some, the main decoration festive table- exotic dishes and tropical fruits. But many prefer traditional, but no less delicious food, which includes jellied meat. It is also often called jelly. However, not every young housewife dares to cook jellied meat - the recipe is not as simple as it might seem at first glance. The process has its own nuances. In order for the jellied meat to turn out not only tasty, but also transparent, appetizing and simply beautiful, it is necessary to follow some rules for its preparation. Do not neglect these recommendations - and jelly will definitely become your signature dish, a real decoration of any festive feast.
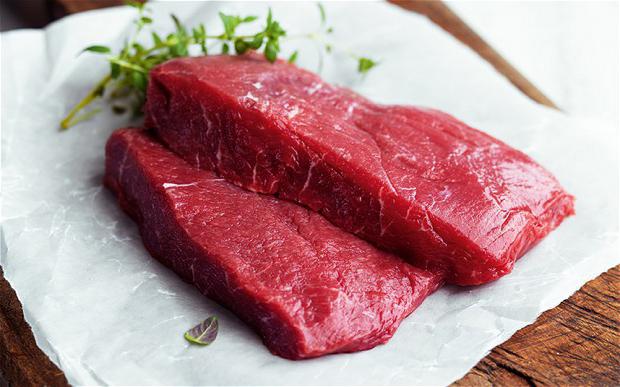
How to choose the right meat for jellied meat?
The first rule for preparing a transparent and tasty jellied meat is the choice of the basis for the dish. For cooking the jelly, you can take almost any meat of your choice - pork, beef, chicken or turkey. However, many experienced housewives recommend opting for beef. Since you can cook beef jellied meat only from some of them, you need to take meat on the bone, the part of the drumstick, which is located closer to the hoof, or beef shank with veins, cartilage or with skin. This choice is due to the fact that they contain special gelling substances that contribute to the rapid solidification of the broth without the use of gelatin and do not make it cloudy in appearance. You can use one or several types of meat.
When buying a meat set for making jellied meat, be sure to make sure it is fresh. If the beef has a specific "old" smell, small spots on the surface, visible traces of frequent frosts, defrosting or too dark color - it is better to refuse to purchase such a product, since it will not work out of it to cook delicious jellied meat. Be sure to make sure that the meat set has approximately the same content of pulp and bone. If beef pulp there will be too much, the jelly simply will not freeze. The same goes for too much bone content. Therefore, the most important thing is to measure everything.
Food preparation
So, fresh meat has been selected for cooking jellied meat. Next, it must be properly prepared. The beef should be soaked - this helps to get rid of traces of blood and provides a beautiful transparent jellied base. If the meat is not soaked, the broth will be cloudy and unappetizing. Place the beef in cold water and let it sit for a couple of hours before boiling the jellied meat. The recipe of any housewife is the same in that the meat should be completely covered with water, otherwise the remaining blood traces and the hardness of the skin cannot be avoided. After soaking, you can safely start cutting. To do this, it is better to use a special meat knife or a hacksaw with large sharp teeth - with its help you can cut the beef bones so that there are no small fragments. If you just chop the beef with a hatchet, then there will definitely be sharp edges on the bones. Next, clean the meat with a knife, freeing it from bone fragments, prepare other ingredients for cooking.
Ingredients for making the jelly
- Beef or meat set weighing from 2 to 4 kg.
- Pure cold water, better purified.
- Salt to taste (see below for information on when to salt jellied meat).
- 2-3 large onions.
- 2-4 large carrots.
- Garlic cloves - 6-8 pcs.
- Spices and herbs of your choice - bay leaves, black peas, red peppers, and celery, dill.
The main stages of cooking jellied meat
Next, how to cook a delicious jellied meat. Place the cooked meat set in a saucepan and cover with clean cold water. Better to choose for cooking of this dish purified or filtered water. If you use regular tap water, there will be a very high probability of a cloudy shade of the broth. In addition, tap water has specific impurities that can give an unpleasant aftertaste to the finished jelly. Water should be taken in a ratio of 1: 2 to meat - this means that 1 kg of beef will need 2 liters of purified cold water. Place the beef pieces very tightly so that the meat is completely covered with water. We put on fire.
So, how to properly cook jellied meat. After 20-30 minutes, as soon as the broth boils, it is necessary to carefully collect all the foam on its surface. The foam will rise throughout the cooking process, so it is very important to collect it thoroughly and regularly at all times. Through this process, the broth will remain clear and beautiful to look at. Many famous chefs recommend not collecting the foam, but completely draining the first water in which the meat was cooked for the jellied meat. Drain off all the water, and rinse the beef itself thoroughly under clean running water - this way the meat will be cleansed of foam residues and bone fragments.
How to achieve a transparent color in the finished dish?
The question that torments not only novice housewives: how to make jellied meat transparent? Everything is simple here. Put the washed parts of the meat set back into the pan and fill with water, chop again if necessary. After that, the pan can be put back on a small fire. Now, when foam or fat appears on the surface of the broth, you can simply remove them using a slotted spoon. As mentioned above, jellied meat is cooked over low heat - that is why the entire cooking process of this dish can take from 5 to 10 hours. Do not increase the heat in an attempt to speed up the long cooking process - the broth will become cloudy, and your jellied meat will turn out to be unattractive and unappetizing. In addition, long-term cooking over low heat contributes to an excellent solidification of the finished jellied meat - you do not need to use gelatin or other substances.
Rules for adding spices and herbs

After the jellied meat has boiled under the lid for 4-5 hours, it is time to add spices and herbs. This happens until the moment when it will be necessary to salt jellied meat (including beef). Do not add these ingredients earlier than the specified period - by the end of cooking, they will lose their taste and characteristic spicy aroma. For jellied meat, it is recommended to use whole vegetables without chopping them. You can take carrots and other vegetables directly in the skins without peeling - you just need to rinse them thoroughly under running water. If you do not like this method, peel the vegetables, but you should not cut them into pieces. Many put a whole in the preparing jelly unpeeled onion- This trick helps to give the broth a light golden hue. Garlic cloves can be put in any form convenient for you - whole or chopped. At the same time, add various spices to your future jelly to your liking - black pepper, allspice peas, celery or parsley root, bay leaf give the dish a special piquancy and incomparable taste. But in no case should you be too zealous with the amount of spices - the finished jellied meat has an incredibly delicate and refined taste that can be easily spoiled with hot spices.
When to salt beef jellied meat?
The basic rule of tasty and mouth-watering dish- correct salting. When to salt jellied meat? Remember that jellied meat must be salted 20-30 minutes before the end of its preparation. If you add salt to the dish earlier, the result will certainly disappoint you. Meat absorbs salt strongly. And even a small amount of it, poured at the beginning of cooking, can make your dish simply inedible. In addition, the broth should be simmered for at least 5 hours - during this time, the water in the pan boils away strongly, so the concentration of salt in the broth becomes excessive. Best option when to salt the jellied meat is half an hour before the end of cooking.
Chop cooked meat correctly

After the jellied meat is cooked, turn off the heat and carefully remove the cooked meat from the pan using a slotted spoon. Whole onions and carrots can also be removed - they have already fulfilled their purpose. Cool the cooked meat slightly. Next, the cooked meat must be thoroughly chopped. This can be done simply with your hands or you can use a small knife to carefully separate the pulp from the bones and cartilage. Many people prefer to use a food processor or a meat grinder to grind meat, but in the case of cooking jellied meat, it is better to avoid such methods, since with a similar method of grinding ready meal loses its unique exquisite taste... Make sure that the cooked meat does not contain small bones, remnants of skins or cartilages. Chop the cloves of garlic through a press and mix them with the resulting meat. It is better not to cut the garlic with a knife, but to press through a special press - this way it will mix better with the beef, there will be no large sloppy pieces.
Pour in the cooked meat correctly
Place minced meat mixed with garlic at the bottom of deep bowls or trays. If you want to make your culinary creation brighter and more original, you can put pieces of boiled yolk or carrots on the bottom of the plates, as well as any other food of your choice. The meat must be poured with the resulting salted broth (we have already mentioned when to salt the jellied meat). To do this, it should be thoroughly filtered through a fine sieve or a gauze cloth folded in half. Thus, small pieces of cartilage and bones, excess fat are removed from the broth. As a result, it acquires an even, pure color and a pleasant shade. Heat the strained broth slightly in a saucepan over low heat and pour it over the cooked meat molds. If you use gelatin in the preparation of jellied meat, it's time to add this ingredient to the broth. To do this, take a glass with already prepared and strained broth, dilute one bag of gelatin in it and add the resulting mixture to the rest of the broth before pouring it into the molds.
Jellied meat freezing
It would seem that for housewives the most controversial issue is the question of when to salt jellied meat. But it is not so. There is one more stage in the preparation of this dish, which raises a lot of questions - solidification.
For the complete solidification of the jellied meat, a rather significant amount of time is required - from 4 to 10 hours. You can leave the tins with a fragrant meat dish overnight. In order for the cooked jellied meat to freeze, it needs a cool temperature, which is below room temperature. You can leave the dish on the balcony or on the windowsill - but these places are completely unsuitable in the winter season. At low temperatures, the delicate jelly left on the balcony will simply freeze and completely lose its unsurpassed delicate taste... The best option for fast and high-quality solidification of jellied meat is a refrigerator.

It is better not to put dishes with beef jellied meat on the top shelf of the refrigerator - as you know, this is the zone of the lowest temperature, and your meat delicacy will simply freeze over. It is not recommended to place molds with beef jelly on the lower shelves of the refrigerator - here, on the contrary, it will not solidify. The best choice would be a middle shelf with an optimal temperature regime.
So, you have learned how to properly cook and when to salt jellied meat. And everything was done according to the recipe. Now your cooking masterpiece ready, but with what to serve it? The traditional answer to this question is various hot sauces, mustard, horseradish or adjika. You can serve delicate meat dish with a little soy sauce- it will add a special piquancy to the jellied meat. Jelly served with pickled mushrooms or cucumbers, fresh or canned tomatoes, salad from fresh vegetables with herbs of your choice.
The most important nuances
In order for the beef jellied meat to turn out to be really tasty and appetizing, follow a few simple rules for its preparation.
- The basic rule of how to make jellied meat transparent is in no case add water to meat that is already being cooked. If, during the cooking process, add a new portion of water to the broth, it will lose its beautiful transparent color and become cloudy. In addition, this broth almost never solidifies without the addition of gelatin. In this case, it is best to immediately pour a little more water than you need into the beef pan - when boiling, the required amount of broth will remain, and its color will not suffer at all.

- Let's repeat when to salt jellied meat during cooking. While cooking tender meat delicacy do not do this at the beginning or in the middle of the process. When cooking, the broth boils away and becomes more saturated, the salt concentration increases significantly. That is why even a small pinch thrown into the jelly pot at the beginning of cooking can make it salty and inedible.
- Many people do not like the specific fatty flavor that a ready-made beef or pork jelly can have. A simple method helps to avoid such an unpleasant phenomenon - be sure to drain the first water in which the meat was cooked. So you not only remove excess fat from the meat broth, but also make the finished dish heavy on the stomach.
- You should not try to put 10 kg of various meat products... Remember that the water in the saucepan should cover the meat by at least 2-3 cm. This is necessary in order to obtain the required amount of pure and aromatic broth as a result. If initially there is too much water in the pan, it will not boil away during the cooking process, and the broth will not solidify well. At the same time, if you add too little water, the opposite problem will arise - it will quickly boil away and you will have to add a new portion of water to the pan. In this case, the appearance of an unpleasant cloudy shade in the finished meat dish cannot be avoided.
- 5-10 hours - this is how much jellied meat needs to be cooked. The recipe does not tolerate haste and sloppiness.
- Many experienced housewives recommend not throwing away the meat cartilage and skins that you get after the end of the beef cooking. Chop these foods thoroughly with a knife, meat grinder or food processor, then gently mix the mixture with the cooked beef. As you know, the cartilage and veins contain special ones that contribute to the rapid solidification of the finished jellied meat without the use of gelatin. At the same time, the taste of a delicate dish does not deteriorate at all.

And finally
Since cooking a delicious jellied meat is a painstaking business and requires a certain skill, you should not be upset if your first jelly turned out not quite as you expected. With a little culinary practice and patience, your dish will become the main decoration of any festive table.
Hello dear readers. Many of us love the holidays, some for the weekend to relax, and others for a friendly feast, where you can meet with friends and have fun. And such holidays are approaching us, this New Year and Christmas. On these holidays, everyone wants not only to relax, but also to eat deliciously. As our friend, a gastroenterologist, said, there is a feeling that people do not eat for a year on purpose, so that later on holidays they will be overeating. And if we are already planning to eat deliciously, then we need to cook deliciously. After all, there is nothing more delicious homemade food, especially cooked with love. We associate the New Year with tangerines, Olivier, a fur coat and, of course, jellied meat. This is a unique dish that can stand in the refrigerator for 3 - 4 days without losing its taste. Today I want to dwell on this in more detail, namely, how to properly cook delicious jellied meat. What kind of meat and vegetables to take. And I will share my cooking secrets. And believe me, we have a lot of experience in this.
Our parents cooked jellied meat for every New Year, and not only. So we support this tradition, we also cook for the New Year holidays. And even more so, we have one more holiday than most readers, we also have a son's birthday between the holidays.
But this was a lyrical digression, let's move on to the jellied meat.
For cooking, we need meat, you have already decided for yourself what you will cook from. I'll show with an example whole chicken, pork shank and beef articular bone. 
I took all this out of the freezer in the evening and sent it to a pot of water to soak until morning. I try to buy everything earlier for jellied meat. Just before the holidays themselves, you need to negotiate with the butchers so that they leave the part you need. There is no set for jellied meat in the free sale. Checked for more than a year.
In the morning they washed them under running water and put them on fire. The water must completely cover our ingredients.
After boiling, drain the first broth and rinse the meat well under running water.
The second time we fill in water 1.5 - 2 cm higher from our meat. And put on fire until it boils.
After boiling, reduce the heat to a minimum, and make sure that our broth does not boil, but languishes.
During the languor, periodically remove the noise and fat that appear, fat as desired.
After 5 - 6 hours, vegetables can be thrown in. This is our onion in husk, with cut roots. The earth should not get into the broth. And one medium carrot, peeled. All this continues to languish. We make sure that the broth does not boil violently.
Along with the vegetables, add two bay leaves, 4 pcs. fragrant and about 8 pcs. black pepper.
7 hours after the beginning of languor, we look at the bones. If the meat begins to lag behind the bone, then the jellied meat is almost ready. Add one tablespoon of salt and remove after a few minutes.
Now we catch the meat with a slotted spoon in a separate bowl. When everything is caught, we filter the broth through cheesecloth or a fine sieve. This is done in order to remove possible small bones.
I recommend doing this in the order described above. And not first straining, and then pouring the meat into another container, or even leaving the meat in the same pan. Small bones remain at the bottom, and then you will have to select them more carefully.
Now we will sort out all the bones from the meat, doing this with a fork and hands. Of course, it is more convenient to do this with meat that has already cooled down, at least a little. We tear the meat into pieces that are convenient for us.
While the meat is cooling, you can collect the fat from the broth and add black pepper to taste, and salt to taste. This is the smell of fresh pepper in the jellied meat. Alternatively, you can add a mixture of grinded peppers. This will make it even more fragrant.
We lay out the sorted meat on plates or trays and fill it all with broth.
Now, if you wish, you can decorate with carrots and parsley. 
We put it to cool on the balcony or in a cold place. But not in the refrigerator. We send to the refrigerator covered trays or plates only after the jellied meat has already cooled down.
We usually get such a transparent jelly. But not everyone likes this. For example, our grandmother loved exactly the muddy one, with pieces of meat that had fallen apart into fibers. And she is not alone in her preferences. We like transparent more.
You can serve jellied meat with homemade mustard or hell, whoever loves. We have a nice one with step by step photos.
Well, now I will reveal to you some secrets of a beautiful, transparent and tasty jellied meat.
Initially, jellied meat was cooked from those parts from which nothing else can be cooked. And these are heads, tails, lower legs with hooves. In general, such a set of "horns and hooves" can be called.
Now we have a large selection of meat, and we approach jellied meat not as disposal of unnecessary parts, but as tasty and hearty dish... And often for the beauty and taste of the dish, we also add pieces of meat. But I want to warn you if you think that the more meat the tastier. Far from it.
In the jellied meat, the articular parts and even the skin must be present. They turn from rich broth in jellied meat is our dish. There are no clear proportions here, the main thing is to understand that the more joints, the more chances for jellied meat to freeze. But do not overdo it, everything is good in moderation.
What meat is needed for jellied meat
Cooking begins with the selection of ingredients. Let's take a closer look at the choice of meat. It is better to buy fresh meat for jellied meat, and it is advisable to inspect and smell it well. Which meat to choose, now let's try to figure it out.
Beef
This is the type of meat that is desirable to add to the jellied meat. Beef "horns and hooves" have high gelling properties, and will help the jellied meat to freeze well. Aspic from one beef has a "lean" taste, and it is better to add more other meat. Usually the head, legs and tail are used, and any trimmed bones. Cook for about 6 to 9 hours.
Pork
This is the second meat that I recommend adding to the jellied meat. With pork, jellied meat is softer, fatter, tastier, and even a little sweeter. Usually the head, legs and tail are used. Particularly popular are the lower leg with the hoof and ears, preferably with a part of the head. Cook for about 7 to 8 hours.
Chicken or turkey
This is the third component of delicious jellied meat. It, like pork, gives tenderness and taste, but not fat. It is better to use old chickens or roosters, since young chickens do not yet have such gelling properties. Usually they take a whole rooster for jellied meat, because it is no longer good for anything other than for noodles. 
But now you can use the neck, legs, and wings, and the soup set is also perfect for taste. But the most useful for solidification of jellied meat are the legs, and not the thighs, but the paws. They contain the maximum collagen content (when cooked), it helps us to strengthen our bones and hair.
Our grandmother loved to cook jellied meat from one paws, she really liked it.
If you take a turkey, now you can buy separately turkey necks, they are great for jellied meat, and will taste like chicken.
Cook for about 5 - 6 hours.
Duck or goose
This is already the kind of bird that is rarely used for jellied meat. Of course, you can cook from this bird, but the taste of jellied meat will be a little with the taste of grass, or even if not grass, then an incomprehensible taste is present. Especially this taste will be felt by those who have tried jellied meat without this bird. But everyone has their own taste, and our aunt likes it. She often cooks jellied meat from geese. You can take paws, necks, or you can take the whole thing, but with a set of additional bones, cook for about 6 - 7 hours.
Rabbit
You can cook jellied meat from a rabbit, but this will not be rational. Firstly, a rabbit is twice as expensive as a chicken, and secondly, it loses to a poultry in taste. It also tastes like grass. For jellied meat, you can use the whole carcass or cook separately from the heads. Cook for about 6 - 8 hours.
Nutria
Even with nutria, you can cook jellied meat. But this is also not for everybody. For example, our father even now cooks jellied meat from the heads and tails of nutria. They keep them, and collect the heads and tails for the jellied meat in the freezer. Mom doesn't like the taste, but father praises it. Cook for about 6 - 8 hours.
Lamb or goat meat
Lamb, like goat meat in principle, has a specific smell, and here jellied meat is not for everybody. Who tried cold lamb, he remembers this unpleasant aftertaste, especially if the part was oily. In jellied meat there is no such obvious aftertaste. You can take heads and legs. Cook as usual for about 6-8 hours. Be sure to soak and add crushed garlic to the finished dish to mask the taste.
Meat of wild birds and animals
In addition to domestic animals and birds, you can also cook from wild. But for the most part, you will have to mask the smell with garlic. But the hunters cook, I was told. The truth is now there is no way to contact that hunter. And I would have told the recipe. Although the principle is the same.
We figured out a little with the meat, and now let's move on to various issues that may arise when cooking jellied meat.
Why soak meat for jellied meat
First of all, the meat is soaked so that the blood comes out, which remains in the bones and capillaries. And also to remove possible dirt and odor. Soaking helps to remove excess odor.
Our parents always soaked meat for the night before cooking jellied meat. But they got some meat out of the freezer. If your meat is fresh, it is still recommended to soak it for 2 - 3 hours. But if the meat already has an extra smell, then add a tablespoon of vinegar to the water. But then be sure to drain the first water in which the meat has boiled.
In which saucepan to cook jellied meat
The main thing here is to understand that if you stay on fire for a long time, the pan may deteriorate. As if it may sound crazy, but in my practice it was like that, the enamel burst. Although he knew very well that it was necessary to cook in an aluminum or stainless pan. But then there was not such a large saucepan at hand, I thought that nothing would happen at once. As a result, bursting enamel on the pan.
Enameled dishes are not suitable for boiling jellied meat.
 After boiling, cook the jellied meat at a temperature of about 90 degrees. This is the average. But it is more important here, not the temperature of the stove, but the absence of violent boiling. Jellied meat should languish, not boil. Rare small air bubbles rise. To do this, you can open the lid, put it on a oven rack, or raise the pan over the fire. We use just such a stand for this. It can easily withstand an 8 liter pot. We put it over the smallest gas burner, on a pan stand and simmer.
What water to take for jellied meat
Only cold water should be taken. Well, it is not advisable to take chlorinated water. You will not hear the smell of bleach in the jellied meat, it will boil out. But the taste will make itself felt. So I recommend taking clean and cold water. It is still not necessary to add additional water during cooking. The jellied meat will not freeze.
Is it necessary or why to drain the water after boiling the jellied meat
To drain or not to drain the water is up to you to judge. Why is the water drained. Firstly, blood residues get into the water, and secondly, excess odors and debris are boiled down, which may not have been washed away. Well, when you change the water, you will have a transparent broth in the future.
You just need to rinse each piece of meat with your hands under running water. And when using chicken meat, it is recommended to do so. So we boil out excess chemical compounds from it, which got into the carcass with feed.
It is imperative to remove the noise that appears during the cooking process.
I believe that jellied meat is just that dish that has its own set of spices and vegetables that should not be changed. You can of course add, but this will distort the taste of real jellied meat.

From vegetables, we put only onions and carrots, and from spices, bay leaves and peppers. You can use allspice, black pepper, or even take a mixture of peppers. A clove of garlic is squeezed into the plate itself, for taste. I do not recommend cooking with garlic. When you add garlic to a plate, you may not add to everything, but only to a few. Jellied meat with garlic will not be stored. This plate should be eaten first.
When vegetables are put in broth
Vegetables are placed in the broth 1 - 1.5 hours before readiness. This is done for the taste and color of the finished broth. Carrots make the broth more transparent, it is even noticeable when you cook jellied meat. Onions give a light aroma and a yellowish color, which is also very good for the finished dish.
You can, of course, quit after boiling the broth, but then you need to watch out for the vegetables, and get them on time. Otherwise, they will boil up. Boiled carrots are then decorated with jellied meat or simply thrown away.
How long is jellied meat cooked
There is no definite answer here. Each meat is cooked differently, for example chicken can be cooked in 4-5 hours, pork in 7-8, and beef in 8-9 hours. But these are average figures.
The chicken may turn out to be an old rooster, and it will take longer to cook than young beef. The main thing is to look at the bones. Jellied meat is considered cooked when meat begins to lag behind the bone. And not in one place, but completely from the bone. This is necessary not for the convenience of removing meat, but for collagen.
How to remove fat from jellied broth
It is good to remove fat from broth during cooking, while parsing jellied meat, or even from a plate. During cooking, along with the noise (coagulated boiled blood), you can also remove the fat, gently with a spoon.
The second option is when they removed the meat, collect the fat from the strained broth, also with a spoon. This will not interfere with meat and pop-up parts.
And you can also cool, both pure broth, and already in plates with jellied meat, and remove the frozen fat. But then, if you remove from the plates, you will get a not quite smooth surface. On the other hand, this way the jellied meat will not become aired during storage. Fat protects the jellied meat from airing.
How to disassemble boiled meat for jellied meat
It is best to disassemble the meat with your hands, or with a fork and hand. This will remove all possible small bones that can be skipped by disassembling with forks. The meat can be torn into pieces that are convenient for you to eat later.
For example, our parents tear in large pieces, and our daughter-in-law tears into small pieces. We personally also like the chunks, not the fibers. So it's up to you to decide.
Do I need to filter the broth
I personally recommend straining the broth. Since when chopping meat, especially chicken parts, small bones appear, which can remain in the broth. Anyway, chicken contains a lot of small bones, and not only chicken. When filtering, we throw out all the garbage.
Why the jellied meat has not frozen - what to do
Aspic usually does not freeze for only one reason, there is not enough collagen, or more simply, articular bones, cartilage. This usually comes from more meat in relation to bones. For example, one leg of pork can help freeze 1.5 - 2 liters of water. If you doubt that the jellied meat will harden, buy chicken legs. They are not expensive, but they help to solidify very well.
If you already have jellied meat ready, and does not freeze, then gelatin will come to your aid. Take one packet of gelatin and dissolve it in a portion of the selected hot broth. Then pour everything into a common bowl and mix well.
It is difficult to say the exact amount of gelatin required, because we do not know how much water you have and the number of articular bones in relation to water.
And the question of whether it is necessary to add gelatin to jellied meat does not even sound like a question, but rather is paraphrased into another, how much gelatin to add to the broth. But you don't need to add a lot of gelatin, then the jellied meat will be like rubber.
Is it possible to cook jellied meat from one type of meat
Attentive readers have already seen the answer to this question, just above in the article. Sure. The main thing here is to understand that in order for the jellied meat to freeze, you need to take more articular bones rich in collagen.
For example, from chicken or other poultry - to solidify, you need to take legs and necks. Such jellied meat is not fatty and lighter for the stomach. Legs and heads should be taken from pork or beef. From the inside of the head and tails.
Aspic from one carcass will not work, be it chicken, duck or nutria. In such a jellied meat, you will need to add gelatin.
How to decorate jellied meat
Jellied meat is usually decorated before it hardens. Usually they use carrots boiled in the same broth, parsley or dill leaves. I saw both a cucumber and an egg in the jellied meat. Your imagination is already included here.
But be sure to decorate before the broth hardens. Then in clear broth bizarre patterns from carrots or other handy products are visible.
Jellied meat can be stored in the refrigerator in a sealed container for up to 5 days. However, jellied meat is one of the dishes that can be stored not only in the refrigerator. I will tell you from my own experience how we stored.
The longest option is to roll it up like in banks. This can be done immediately after cooking, or after a few days, when you realize that you cannot eat everything.  This is done with these simple devices. Just roll the jellied meat into jars, and fix the lid with a clamp or a special press, boil for 30 minutes. It will be stored in this form for up to 6 months, then it loses its taste and it is no longer recommended to eat it. But this is the deadline.
Is it possible to store jellied meat in the freezer
The next option is in sealed trays in the freezer. It can be stored here for several weeks. Then take it out of the freezer, hold it for room temperature from 30 minutes to an hour. When parting, water is formed, drain it. But boil the rest and put it back on solidification, but in a cold place, but not in the freezer.
The main thing in this storage is that the tray is airtight, otherwise it will be saturated with the smell of the freezer, and you can safely discard the jellied meat. Even garlic can't kill this smell.
You have already learned some of the subtleties and secrets, now you can safely cook jellied meat yourself. If you can add something on the topic, I will be grateful to you. Good mood and all the best to you!
How to properly cook delicious jellied meat - basic cooking rules good jellied meat... In order to prepare transparent jellied meat, you need to remember a few simple rules, adhering to which you can easily create this culinary masterpiece.
Rule 1. The choice of the main ingredient - meat. You can cook jellied meat from any meat (chicken, pork, beef, pork legs, etc.), the most important thing is to choose the right main product.
It is best to buy such an important component in jellied meat as meat on the market, because there it is guaranteed not to be frozen. Pork legs, which are the key to the solidification of the dish, must be well cleaned of bristles, and, if necessary, burned over a fire, then rinsed. You can add any meat you like. Will it be chicken, beef or all the same pork jelly- the hostess decides, but pork legs (to be more specific, the part that ends with hooves) is necessary, then no gelatin is needed. If the meat is with a skin, then this will also play a good role in the solidification of the jelly. The size of the pieces of meat for jellied meat does not play a big role. The brisket and lower leg can be cut into several parts, and the large and central bone can be left intact. In order to avoid small bones, pork legs need to be cut in half lengthwise, and then again in half along the joint.
But, oddly enough, you can't overdo it with meat. It is necessary to observe some proportions, otherwise there is a risk that the dish still does not solidify: for a few pork legs weighing about 700 grams, you can take no more than one and a half kilos of the remaining meat components.
Rule 2. Meat must be soaked before cooking. This procedure is needed in order to remove the remnants of clotted blood from the meat. In addition, the skin after soaking will be much softer and more tender. Taking a saucepan and placing meat ingredients in it, you need to completely soak them in cold water, and leave for several hours (or better overnight). In the morning, you can rinse the meat again, scrape the pork legs thoroughly to remove the smoked spots. Also peel the rest of the meat components. The little vegetable knife is like nothing else for this task. Then you can put the meat in the cauldron and start cooking.
Rule 3. The first water must be drained! The conviction of some housewives that descaling with a slotted spoon will completely solve all problems is not entirely correct. It is better to drain the first water after boiling the meat, since all excess fat and other unwanted components will be removed with it. Moreover, the appearance of such a jellied meat will be much more attractive, its calorie content will noticeably decrease, and the smell will become much more pleasant. Ideally, you can drain the second water, then the jelly will be clean and transparent, like a baby's tear. Having drained the broth, it is necessary to rinse the contents of the cauldron under running water, which will remove small adhering residues of coagulated protein. Then you can put the meat back for the final cooking. The amount of water should be about 2 centimeters above the meat level. If the amount of water is greater, then it will not boil off as expected. Consequently, the jelly may not harden. If there is less water, then during the cooking process it will be necessary to add it from the kettle, which will also not have a very favorable effect on the final result.
It should also be taken into account that in order for the jellied meat to turn out transparent, the contents of the cauldron must not be allowed to boil. You need to cook the jelly over low heat, for about 6 hours, and then the result will exceed all expectations.
Rule 4. Spices and seasonings also have their turn After 5 hours have passed since the beginning of cooking, you can add a whole onion and carrots to the broth. If you do this earlier, then all the "delights" from the addition of these ingredients will evaporate along with the boiled water.
Salt should also be added to the jellied meat after 4-5 hours, because in the process of boiling water, the broth becomes more concentrated, and there is a possibility of simply oversalting the dish.
It is better to add allspice, lavrushka and other spices to taste thirty minutes before the end of cooking, then the bouquet of aromas will win the hearts of even the most scrupulous critics.
Rule 5. How long does it take to cook jellied meat.
- - pork jellied meat (pork legs, shanks) 5-6 hours;
- - chicken jelly 3-4 hours;
- - beef jellied meat 7-8 hours.
But it is best to cook jellied meat from assorted meat, then it will turn out to be more tasty and rich.
Rule 6. The bones are removed by hand, not with a meat grinder After the jelly has finished boiling, it is necessary to remove the meat from the pan. It is most convenient to do this with a slotted spoon. The broth must be filtered through a colander, or better through a clean cloth, removing the onion, carrot, peppercorns and bay leaf.
Slightly cooled meat must be carefully handled, separating it from the bones (you can help yourself with a small knife). It is better to cut meat by hand, and not using a meat grinder, as this will ensure that even the smallest bones, which are very easy to break teeth, will not fall into the plate of any of the guests. It is better not to throw away the skins and cartilage, because they will give the jellied meat strength. At the bottom of the plate, in which the jellied meat will freeze, you can put greens or cut various figures from carrots - this will be an excellent decoration for such interesting dish... After that, expanding meat mass in a prepared container, you can fill it with broth.
Rule 7. The right temperature is the key to success. The best place for the jellied meat to freeze, it is not a window sill or even a cold balcony. The most "correct" temperature for the jelly is on the middle shelf of the refrigerator. After all, if the jellied meat is not cold enough, then it will not freeze, and if, on the contrary, it freezes, it will lose all its excellent taste. This culinary masterpiece will freeze for 5-6 hours.
Rule 8. If the jelly is not frozen (Jellied meat with gelatin) If the jelly is not frozen, you should not worry. The dish can be easily salvaged by pouring it back into a clean pot and boiling it for a few minutes. Next, you need to dilute the gelatin in a separate bowl according to the instructions on the package (see the dosage there). Pour the gelatin into the jellied meat and mix well, pour into plates. After such a procedure, the jelly will harden for sure, there is no doubt.
Jellied meat recipe
To prepare delicious jellied meat, you will need the following products:
Basic rules for making good jellied meat
In order to prepare transparent jellied meat, you need to remember a few simple rules, adhering to which you can easily create this culinary masterpiece.
Rule 1. Choosing the main ingredient - meat

You can cook jellied meat from any meat (chicken, pork, beef, pork legs, etc.), the most important thing is to choose the right main product.
It is best to buy such an important component in jellied meat as meat on the market, because there it is guaranteed not to be frozen.
Pork legs, which are the key to the solidification of the dish, must be well cleaned of bristles, and, if necessary, burned over a fire, then rinsed. You can add any meat you like. It will be chicken, beef or all the same pork aspic - the hostess decides, but pork legs (to be more specific, the part that ends with hooves) is necessary, then no gelatin is needed.
If the meat is with a skin, then this will also play a good role in the solidification of the jelly. The size of the pieces of meat for jellied meat does not play a big role. The brisket and lower leg can be cut into several parts, and the large and central bone can be left intact. In order to avoid small bones, pork legs need to be cut in half lengthwise, and then again in half along the joint.
But, oddly enough, you can't overdo it with meat. It is necessary to observe some proportions, otherwise there is a risk that the dish still does not solidify: for a few pork legs weighing about 700 grams, you can take no more than one and a half kilos of the remaining meat components.
Rule 2. Meat must be soaked before cooking

This procedure is necessary in order to remove the remnants of clotted blood from the meat. In addition, the skin after soaking will be much softer and more tender.
Taking a saucepan and placing meat ingredients in it, you need to completely soak them in cold water, and leave for several hours (or better overnight). In the morning, you can rinse the meat again, scrape the pork legs thoroughly to remove the smoked spots. Also peel the rest of the meat components. The little vegetable knife is like nothing else for this task. Then you can put the meat in the cauldron and start cooking.
Rule 3. The first water must be drained!
The conviction of some housewives that descaling with a slotted spoon will completely solve all problems is not entirely correct.
It is better to drain the first water after boiling the meat, since all excess fat and other unwanted components will be removed with it.
Moreover, the appearance of such a jellied meat will be much more attractive, its calorie content will noticeably decrease, and the smell will become much more pleasant. Ideally, you can drain the second water, then the jelly will be clean and transparent, like a baby's tear.
Having drained the broth, it is necessary to rinse the contents of the cauldron under running water, which will remove small adhering residues of coagulated protein. Then you can put the meat back for the final cooking. The amount of water should be about 2 centimeters above the meat level. If the amount of water is greater, then it will not boil off as expected. Consequently, the jelly may not harden. If there is less water, then during the cooking process it will be necessary to add it from the kettle, which will also not have a very favorable effect on the final result.
It should also be taken into account that in order for the jellied meat to turn out transparent, the contents of the cauldron must not be allowed to boil. You need to cook the jelly over low heat, for about 6 hours, and then the result will exceed all expectations.
Rule 4. Spices and seasonings also have their turn

After 5 hours have passed since the beginning of cooking, you can add a whole onion and carrots to the broth. If you do this earlier, then all the "delights" from the addition of these ingredients will evaporate along with the boiled water.
Salt should also be added to the jellied meat after 4-5 hours, because in the process of boiling water, the broth becomes more concentrated, and there is a possibility of simply oversalting the dish.
It is better to add allspice, lavrushka and other spices to taste thirty minutes before the end of cooking, then the bouquet of aromas will win the hearts of even the most scrupulous critics.
Rule 5. How long does it take to cook jellied meat.

- pork jellied meat (pork legs, knuckles) 5-6 hours;
- chicken jelly 3-4 hours;
- beef jellied meat 7-8 hours.
But it is best to cook jellied meat from assorted meat, then it will turn out to be more tasty and rich.
Rule 6. Bones are removed by hand, not with a meat grinder

After the jelly has finished boiling, it is necessary to remove the meat from the pan. It is most convenient to do this with a slotted spoon. The broth must be filtered through a colander, or better through a clean cloth, removing the onion, carrot, peppercorns and bay leaf.
Slightly cooled meat must be carefully handled, separating it from the bones (you can help yourself with a small knife).
It is better to cut meat by hand, and not using a meat grinder, as this will ensure that even the smallest bones, which are very easy to break teeth, will not fall into the plate of any of the guests.
It is better not to throw away the skins and cartilage, because they will give the jellied meat strength.
At the bottom of the plate, in which the jellied meat will freeze, you can put greens or cut various figures from carrots - this will be an excellent decoration for such an interesting dish. After that, having decomposed the meat mass into a prepared container, you can fill it with broth.
Rule 7. The right temperature is the key to success

The best place for jellied meat to freeze is not a windowsill or even a cold balcony.
The most "correct" temperature for the jelly is on the middle shelf of the refrigerator.
After all, if the jellied meat is not cold enough, then it will not freeze, and if, on the contrary, it freezes, it will lose all its excellent taste. This culinary masterpiece will freeze for 5-6 hours.
Rule 8. If the jelly is not frozen (Jellied meat with gelatin)

If the jellied meat is not frozen, you should not worry. The dish can be easily salvaged by pouring it back into a clean pot and boiling it for a few minutes. Next, you need to dilute the gelatin in a separate bowl according to the instructions on the package (see the dosage there). Pour the gelatin into the jellied meat and mix well, pour into plates. After such a procedure, the jelly will harden for sure, there is no doubt.
 To prepare delicious jellied meat, you will need the following products:
pork knuckle weighing about a kilogram;
0.5 kg of pork;
one onion;
2-3 bay leaves;
5-6 peas of allspice;
2-4 cloves of garlic;
2.5 liters of water;
salt.
Jellied meat preparation:
1. Prepare the meat: rinse and cover with water, soak for a couple of hours. After that, it is good to clean the shank and cut it in two.
2. Pour cold water into a saucepan and place all the meat in it.
3. After boiling, drain the first broth and add 2.5 liters of cold water to the meat.
4. Bring to a boil and reduce heat as much as possible (so that the broth barely boils). Cook jellied meat for 5 hours.
5. Next, put onion, pepper, salt and bay leaf into the broth. Let it simmer for another hour.
6. Remove the meat from the pan, and put the garlic crushed by a knife blade into the broth.
7. Divide the meat into small pieces. Strain the broth through a fine sieve or clean cloth.
8. Put meat in molds for jellied meat and pour broth. Allow to harden (preferably in the refrigerator on the middle shelf).
9. Serve the jelly, pre-garnished with herbs, with mustard or horseradish.
Based on the foregoing, you can formulate several basic tips that will help you cook jelly correctly, and most importantly, tasty.
1. The meat must be fresh.
2. For the jellied meat to freeze better, it is better to take a pork knuckle or animal legs for cooking.
3. In order for the jelly to taste good, the meat must first be soaked in cold water.
4. It is better to drain the first broth.
5. Spices and seasonings should be added shortly before the end of boiling jellied meat to preserve their aroma.
6. Pits from meat must be carefully selected by hand.
7. Jellied meat should freeze at the correct temperature - on the middle shelf of the refrigerator.
8. If the jelly is not frozen, you can simply add the gelatin, after boiling the jelly.
9. Do not add too much water, as the jellied meat may not solidify. Too little water is also not the best option.
10. Jellied meat should be salted at the end of cooking so as not to oversalt the dish.
That's all, the jelly is ready, and there is nothing super complicated. You just need to carefully choose the meat, and carefully consider its cooking, and then the jellied meat is doomed to success!
How to cook jellied meat from beef, pork and chicken video recipe
Interesting on the site

| Tell your friends! |